
First, I crocheted the basic shape out of scrap yarn, I had around the house and had never used. I single crocheted it with either an E or F hook. I think it was about 22 across for the grabber ones, and about 27 across for the trivet ones, I just kind of eye-balled it and the made another to match. I did enough rows to make the big ones square, and enough to cover my hand on the small ones (probably about 24 or or so).
Second, I took some scrap fabric that I never liked the look of and put two layers of that (cut to about size) on each one. To hold that in place, I just took some thread that I don't really like the color of anyway and tired in a lot like you would tie a quilt, just to hold it in place.
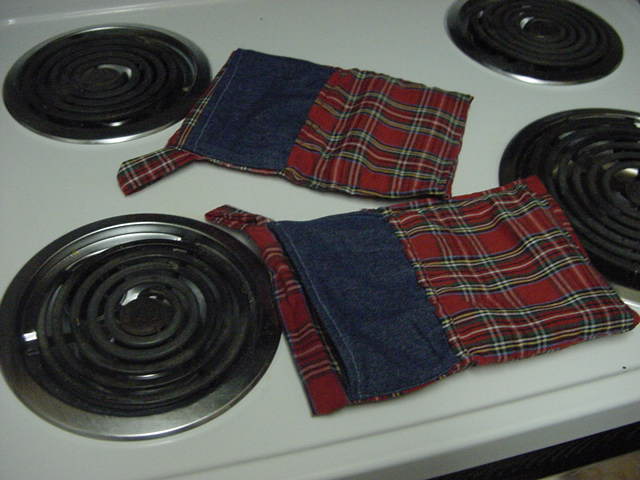
Eventually I got to the next step which was to pit on the fabric that I liked. This fabric used to part of a skirt that I got for free but the cut was REALLY unflattering on me, plus I like to not have too many patterns on my bottom half since I'm a little more pear shaped and I like more neutrals on the bottom so people's eyes aren't drawn to the overly curvy areas. Moving on...I cut the fabric I wanted just a little bigger than the currant hot pad size for seam allowance, and had several small strips of fabric for the loops to hang them up. On the loops I just folded them over with right sides together and sewed one line near the open edge. I used a crochet hook to turn them right side out. For the hot pads themselves, I sewed the fabric for the outside on three sides with right sides together, then turned them right side out, put the innards of the hot pads in, folded the frayed edges in, tucked the loops I'd sewn in the corner, and sewed really close to the edge to seal up tat side.
For the grabber hot pads, I just tucked an extra piece of fabric in there when I was sewing up the sides (I had to be careful to make sure the right side would be facing out) so it made a little pocket for my hand to fit into. It was very simple, and made with things I had around the house and wasn't using, so virtually free! Then I noticed something.

It took me forever to get around to finally fixing it, during which time I also noticed that when I needed to take something out of the oven or off the burner quickly, it took a bit of time to figure out which side of the hot pad had that stupid pocket in it!
So, I took some more scrap fabric, in a different color, and cut it to just a bit bigger than I needed.


No comments:
Post a Comment