This week I have read and focused on the first chapter (and introduction and guidelines in the beginning of the book). Everything in this book all comes together to make an effective parenting style. But here are some of the main points:
Children thrive on routine. When you change something about your parenting style, your kids will try to make you behave like you're "supposed to." Nelsen refers to this as the kick-the-soda-machine-effect. They exaggerate their behavior to make you behave like they expect, sometimes a temper tantrum, but when they see that that doesn't work (it helps to ignore and or leave the room), they soon slowly changing themselves. I noticed this with my two year old, soon to be three year old, who is very into the "terrible twos." He'd been extremely rough with his sister. Even though she is two years older and much taller, he would still attack her by biting and scratching and punching and hitting. Sometimes it would start as playing, sometimes he'd truly be frustrated (she is sometimes bossy). We would put him in the corner, talk to him, spank him, put him in bed, even let her hit him back, and not only was the behavior not stopping, but he rebelled against the discipline. He would get out of the corner or out of bed repeatedly and scream and throw a fit. We would end up letting this drive our bus and we would get more and more frustrated. After reading some of this book again I decided that raising my voice when he tried to get out of time out was obviously not working. So when he hit his sister again, I simply picked him up, and put him in his bed without saying anything except a calm "You need to be soft with your sister." He of course tried to get out of bed and I gently, but with enough firmness to be sure I was effective, put him back in his bed and calmly told him to stay in bed. Of course he didn't listen, but instead of getting more extreme I just put him back in his bed without saying anything and then left the room quietly. He cranked it up and really started to show his disapproval! I looked at him and put my finger to my lips to show be quiet. I could tell he was thinking about what to do next. I started to leave the room again and he started to scream and stomp his feet. I put him back in his bed and calmly but firmly told him to stay there. He sobbed for a while, but eventually calmed down. It was hard to keep my cool as he ramped up the tantrum, but I'd been praying for help. It's been close to two months since then and he practically never hits his sister anymore! All I had to do was remain calm, consistent, and not demeaning. I emphasize here that I was praying for help because I was mentally exhausted from dealing with his behavior. I also started spending more one on one ime with him, playing with legos or just him going with me to the store.
Wow I'm long winded! And I'm not even done!
Another wonderful point Nelsen emphasizes is to not be permissive and also not authoritarian. Permissiveness will not help your child to be the kind, respectful, self-reliant person you want them to become. They will focus all their energy into manipulating others to do their will feel like they are entitled to every desire. On the other hand, authoritarian methods may illicit immediate responses, not Nelsen warns "beware of what works." Just because the bad behavior has stopped for the moment, doesn't mean the behavioral issue has ceased, it will just come up another time, and then again and again. If you are using "punishment" (which is not the same as discipline because punishment is to make the child feel bad about themselves while discipline is still respectful and not done in the spirit of vengeance or anger, but rather to help correct misconceptions a child may have about themselves or the world around them) you must beware the Four R' of Punishment:
1. Resentment-("This is unfair. I can't trust adults.")
2. Revenge-("They are winning now, but I'll get even.")
3.Rebellion-("I'll do just the opposite to prove I don't have to do it their way.")
4. Retreat:
a.Sneakiness-("I won't get caught next time.")
b.Reduced self-esteem-("I am a bad person.")
Children do not develop positive characteristics based on these feelings.
So the solution to not being to extreme on either end of the parenting spectrum, is to be kind and respectful, but firm. You don't let your kids get away with murder, but you don't humiliate and demean them when they do wrong either. You also don't switch back and forth between the two. It's a tough line to walk sometimes. When we first took this class we had one child, who was a baby, so as she grew implementing these things didn't seem too difficult. But as we added more kids and therefore more temperaments and personalities, it got a lot trickier!
A good example is the book is the example of Johnny and his mother at breakfast. There are three different kinds of situations, in the first, the authoritative mother decided what Johnny will eat, then does what she can to coerce him to eat it, then scolds him for not eating it and sends him out to play, when he comes in two hours later saying he's hungry, she begins her very long speech of "I told you so." He then is sent off to play while mom makes liver and spinach for lunch to make up for the nutrition he lost from not eating breakfast, and the cycle starts again. With permissive mommy, johnny requests his mom make eggs over easy for breakfast, has mommy redo it 9 times to get it right, decided he wants french toast and while mommy makes that he watched TV and sees a Wheaties commercial, so he decides he wants Wheaties. Of course he doesn't like it and says he wants sugar krispies, which they don't have, so mommy runs to the store to buy some. (That would drive me nuts by the way!) In the Positive discipline approach, Johnny dresses and makes his bed before breakfast, then mom lets him choose between Wheaties and Cheerios, he's seem the commercials for the "breakfast of champions so he chooses Wheaties, only to discover that he doesn't like it. Mom simply tells him that they can't re-flake them so he can go ahead and play. He comes in later to tell his mom that he's so hungry, this is one of the major differences here, the positive discipline mom says "I bet, but I'm sure you can make it until lunch time." No lecture on how he should have eaten his breakfast, no giving in and feeding him breakfast then because she feels bad for him, she just shows some sympathy, emphasizes the positive, and moves on. If he throws a fit, she leaves he room, a tantrums not nearly as fun without an audience.
The last point I would like to touch on is in the guidelines at the beginning of the book. It's when tucking your child into bed ask them to share with you their "happiest time" during the day and their "saddest time" during the day. Then share with them yours and you'll be surprised what you learn. I've started to do this this past week and was surprised especially by me two year old. On Saturday our apartment complex had an Easter party where the kids got to go on an Easter egg hunt, have a sack race, eat hot dogs, bounce in a big bouncy house, it was just a lot of fun for them! Later on that evening I realized that we were out of milk so I went to the store to get some, and brought only my two year old along, and let him pick the cereal we would get (with a few parameters). When I tucked him in that night, guess what his happiest time was? It was going tot he store with mom. This pulled at my heart strings a bit and I felt really close to him. Even closer than I had before that moment.
I still have a lot to learn but I'm really enjoying going through this book. It's helping me to consciously think about how I am as a parent, and evaluate myself.
Friday, April 29, 2011
Sweet Corn Bread (with secret ingredient)
When I was growing up, my mom always had a good sized garden. One thing that she seemed to grow a lot of was various squash and pumpkins. Since we usually bout our Halloween pumpkins from a local farm, and we never had squash as a side dish (as far as I knew) at dinner, I eventually got old enough to wonder why in the world she grew so much of something we never ate. Often, we would have corn bread as a side dish a dinner, being a picky eater, that would be the majority of what I would eat. Sometimes, when we got home from school, my mom would have a not TOO sweet but still delicious snack cake waiting for us as an after school snack. I went off to college, not knowing why my mother grew squash.
My sophomore year of college, one of my roommates made cornbread with a special ingredient. The secret ingredient was yellow cake mix. It was very sweet but I thought it was much too dry and crumbly compared to what I was used to. When I made my weekly phone call home I mentioned in passing to my moth about the overly dry cornbread. It was then that my mom told me HER secret ingredient, which was pureed squash! What? How sneaky! As a picky kid all I could tell was that it was sweet and moist. My kids also enjoy this cornbread. My mom would cook and then puree the squash when it was ripe and then freeze it in small quantities in Ziploc bags in the freezer so she could make her sneaky healthier recipes all year long! I late deduced that the snack cakes must have been secretly healthy too, after all, squash grew really well in her garden.
SWEET CORN BREAD
1/2 cup butter, soffened
1/2 cup sugar
2 eggs
1 1/2 cups flour
1 cup cornmeal
1/2 tsp salt
2 tsp baking powder
1 1/2 cups milk (we use skim)
1 cup cooked, pureed squash
Mix ingredients well. Pour into a greased 9 x 13 inch pan ( or 8 inch square pan if you like thicker cornbread). Bake at 375 degrees for 20 minutes.
Friday, April 22, 2011
Positive Discipline
Shortly after our first child was born, my husband and I took a series of parenting classes together. One of the most helpful series was a free class at the local middle school called Positive Discipline, based on the book by Jane Nelson. It really helps us see our kids as real people and help them not just to behave better, but to overall be better people.
Some of the main points are:
Misbehaving children are discouraged children, who have mistaken ideas on how to achieve their primary goal-to belong. Their mistaken ideas lead them to misbehavior.
Use encouragement to help children feel a sense of belonging so that the motivation for misbehaving will be eliminated.
Get rid of the crazy idea that in order to make children do better, first you have to make them feel worse. Do you feel like doing better when you feel humiliated?
Punishment may work if all you are interested in is stopping misbehavior for the moment. Sometimes we must beware of what works for the moment when the long range results are negative-resentment, rebellion, revenge, and retreat.
Teach and model mutual respect by being kind AND firm.
Take time for training. Your children may think "clean the kitchen" means put the dishes in the sink.
There is SOOOOO much more to this book, but those are some of my favorite highlights. We had the book for kids 0 to 3, but it was ruined in a flood. Now we have one child over three and one about to be three, so only the baby fits well into the 0-3 category. We got the copy of the regular positive discipline we have now when my mom found it at a library book sale for $0.75! We had told her that we were trying to find a decent priced copy, it's not like she was trying to give us a hint or anything.
This book is also made to help teachers, which is appropriate since we're planning on homeschooling our kids!
Guess what! I'm going to start a series of posts based on the chapters! There are 10 chapters, so I'll read and focus on one per week and post at the end of that week on my favorite parts and things I've noticed with my kids!
The posts for this series will be as follows:
The Positive Approach
Some Basic Concepts
The Significance of Birth Order
For Mistaken Goals of Behavior
Natural and Logical Consequences
Using and Encouragement Effectively
Class Meetings
Putting It All Together
Love and Joy in Families and Schools
Saturday, April 16, 2011
New Toybox
We don't like to spend much money on anything if we can help it. We try to be creative in what we use and how we use it. When our oldest was small, we used storage crates or laundry baskets to organize the mass amounts of toys that come with other people knowing that you have a child, we had a series of big moves that forced us to seriously limit how much stuff we had (although that was really hard, it was such a burden lifted to not have as much "stuff"). Since we've settled a little bit and aren't moving nearly as much anymore, and only making small moves when we move, plus we've had two more kids, they kid stuff seems to grow exponentially! Cardboard boxes became our toy box of choice, which worked fine when we had nothing else, but started to fall apart. I tried fixing the box with duck tape, but the tape came off and my kids used it for ghetto bracelets, classy.

See what I mean?
So I decided it was time to bite the bullet and get something more permanent. I went to Walmart and got one of those big plastic buckets they display holding various party things like drinks or whatever. I think it was just under $6. Then I had little helpers transfer they toys and viola!
 Much better! And you know what else is neat about this?
 It fits in the closet! So the bedroom feels even more open and organized in the kids room! And they enjoy more room to run around and play!
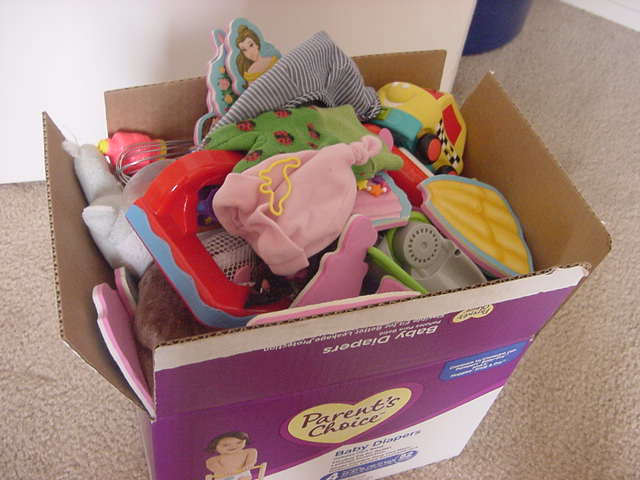
Something that I was awed by too, was that not all the toys from the cardboard box fit into the big blue bucket, so my kids VOLUNTARILY, without any prompting from me, went through their toys and came up with stuff that they didn't want anymore to donate to charity! Keep in mind these kids are almost 3 and 5! The only problem was that they were willing to give away the baby's toys, so I had to regulate that a bit. But here's the stuff they CHOSE to give away!
 That's the biggest box that Walmart sells diapers in, packed with toys for charity! I still can't believe it! I'm so proud of them!

See what I mean?
So I decided it was time to bite the bullet and get something more permanent. I went to Walmart and got one of those big plastic buckets they display holding various party things like drinks or whatever. I think it was just under $6. Then I had little helpers transfer they toys and viola!


Something that I was awed by too, was that not all the toys from the cardboard box fit into the big blue bucket, so my kids VOLUNTARILY, without any prompting from me, went through their toys and came up with stuff that they didn't want anymore to donate to charity! Keep in mind these kids are almost 3 and 5! The only problem was that they were willing to give away the baby's toys, so I had to regulate that a bit. But here's the stuff they CHOSE to give away!
Thursday, April 14, 2011
Zucchini Bread
When I was a kid, my mom used to make this. I couldn't pronounce "zucchini bread" so I called it "bikini bed." That sure puts a different mental image in your mind, doesn't it?
I love bread that you don't have to let rise!
Zucchini Bread
3 eggs, beaten
1 cup oil
2 cups sugar
2 cups grated zucchini
1 Tbs vanilla
3 cups flour
1 tsp salt
1 tsp baking soda
1/4 tsp baking powder
2 Tbs cinnamon
1 cup chopped nuts (optional)
Combine ingredients. Grease and flour 2 loaf pans. Bake at 325 degrees for 1 hour.
Tip: If you grow zucchini in your garden, or if a friend of yours does and gives you a lot come harvest time. A good thing to do is wash and grate the zucchini and freeze it in small freezer bags in 1 or two cup quantities, so you can make this and other recipes with zucchini throughout the year and all you have to do is take it out of the freezer. Note: sometimes frozen zucchini comes out a little watery, so you can drain off excess water, or just have a little more moist bread!
Wednesday, April 13, 2011
Picnic Ideas

 Just put whatever your having for lunch in some tupperware
If you don't have a picnic blanket, either: just sit at a picnic table at a park, or just sit on a vinyl tablecloth, or just use an old sheet or blanket that you don't care about anymore, or use something that won't sow grass stains very much and wash it really well afterwords!
Some menu ideas:
Leftovers from the night before (heat them before leaving the house)
Sandwiches: pb&j, pb& honey, ham and cheese, whatever
Taco salad
Macaroni and cheese
hot dogs (heat and wrap in tin foil)
ants on a log (celery with peanut butter and raisins)
yogurt parfaits (yogurt with some kind of cereal, we like the honey oat cluster mixed with vanilla yogurt, we bring cups,spoons, a bag of cereal, and yogurt in the tub. Then we mix it in out individual cups and enjoy!)
BBQ (if you have a grill or if you go to a park with a grill)
Another tip if you have a baby, is being some baby food in a little jar or tupperware and a baby spoon and bib and then spoon feed them in their stroller (this works best with things you know they'll gobble up, like applesauce or mashed bananas).
My kids love little picnics! Another nice thing about them is that if you have something that makes a lot of crumbs, you just have to brush off the kids when they stand up, you don't have to worry about cleaning your whole dining area after lunch! Yay for laziness!
This post is linked to the 4 moms, 35 kids picnic linky at Smockity Frocks
Monday, April 11, 2011
Plastic Bag Holder
 What do you do with all the plastic grocery bags you get from the store? Do you just throw them out? Do you use cloth bags (if so, power to you!), or do you put them in one place to use later? We use ours to wrap poopy diapers and as liners for the small bathroom garbages. But how to keep them organized so it doesn't overwhelm you and make you want to scream when you try to get a bag? A bag holder! Hold on, we're watching our money and every penny counts, that's money we could use to buy diapers for the kids to poop in and require the need of the organized bags! That's where it's handy to be resourceful and a little creative! This is my bag holder! (My apron is behind it if you're wondering) It probably took me an hour to make (that's an hour of actually working on it, start to finish was much longer since I kept having to do other things like make dinner, feed the baby, and so on). It was really simple.
 I used some scrap fabric from non-flattering and worn out clothes, and some yarn I had sitting around that needed a job. the fabric I wanted to use was only usable in small strips so I sewed the strips together to make a big rectangle, about 20 inches wide and 24 inches long. You can change this to your own needs, but this worked for us!
I folded the two shorter sides over about 3/4 of an inch and sewed them as close to to non folded edge as I could, this made two long, tube-like pockets.
Then I folded the fabric longways, so the tubed pockets were on the top and bottom with right sides together.
Starting AFTER the first pocket, I sewed a straight seam that ended BEFORE the other pocket, you don't want to sew your pockets closed!
Then I took my yarn and made two crocheted chains about 9 inches long. Pieces of yarn or elastic that long work fine too, I just did yarn because I had no elastic, and the chain gave me a little elasticity.
TIP: If you have a worn out fitted sheet that you're wanting to use for something else, the elastic from that would be great in this project!
To get the elastic or yarn to go into the tube like pockets, put a safety pin through the end and then you can wriggle it through by feeling it. This works much better that tying to jam or hook it through with a crochet hook (I speak from experience).
Tie the yarn or sew the ends of elastic together.
Next, I tied some more yarn to the top yarn to make a loop I could hang it from.
Easy cheasy lemon squeazy! Stuff bags in the top, pull them out from the bottom!
Saturday, April 9, 2011
Toddler Bed bolts
The label to this post should probably be something more like "Stuff I've been meaning to do for a while and finally got around to doing it," but that would be almost every post in this blog, except maybe some of the recipes (but you could argue that I've been meaning to post that recipe for a while and finally got around to posting it, so nothing's immune!) so I won't do that.
We got this toddler mattress several years ago, and them some family members found a second hand frame and gave it to us. When we put it together, we didn't have the right size bolts, so we just used what we had an warned our kids to be careful. We kept MEANING to get bigger bolts and replace the current ones, but it was very low on our priority list, so naturally, it didn't get done. When we moved we took the bed apart and said that we would only put it together with the right sized bolts! As you can imagine, it therefore sat in the kids room, leaned up against the wall, with a mattress on the floor as our two year old's bed for several months. Well I finally decided to go get those bolts! I measured the diameter of the holes and then got the closest match at the store that I could find, they were too big, so I had to take them back and exchange them and I FINALLY got the bed put together!
 Look! It looks like a real bed! We're slightly less ghetto in one area of our lives! But the best part?
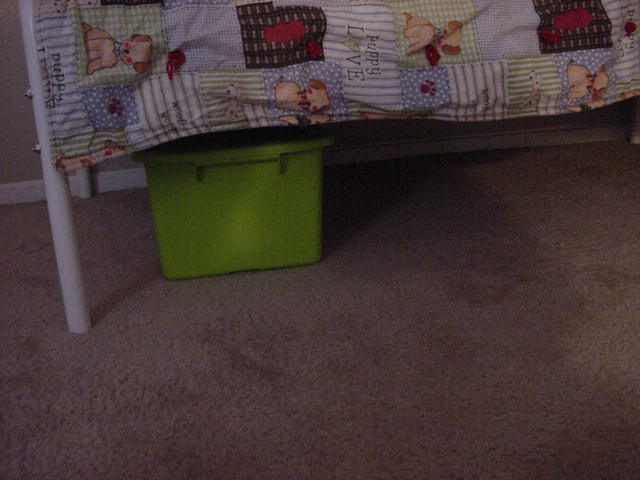
 Storage space UNDER the bed! That's our Lego box, and it fits under there so perfectly! I will most likely put more Bins of various things under there as need be, but for now the space is available!
Yea for overcoming procrastination in at least one thing!
We got this toddler mattress several years ago, and them some family members found a second hand frame and gave it to us. When we put it together, we didn't have the right size bolts, so we just used what we had an warned our kids to be careful. We kept MEANING to get bigger bolts and replace the current ones, but it was very low on our priority list, so naturally, it didn't get done. When we moved we took the bed apart and said that we would only put it together with the right sized bolts! As you can imagine, it therefore sat in the kids room, leaned up against the wall, with a mattress on the floor as our two year old's bed for several months. Well I finally decided to go get those bolts! I measured the diameter of the holes and then got the closest match at the store that I could find, they were too big, so I had to take them back and exchange them and I FINALLY got the bed put together!

Yea for overcoming procrastination in at least one thing!
Thursday, April 7, 2011
Chinese Chicken
Chinese Chicken
5-7 boneless skinless chicken breasts (or however many fit into your 9x13 inch pan without layering)
1 cup soy sauce
1 cup brown sugar
Place chicken in 9x13 inch pan. In bowl, combine soy sauce and brown sugar until thoroughly mixed. Pour evenly (as possible) over chicken. Bake 350 degrees for about 1 hour. I usually flip them with a fork about halfway through, and cut them into smaller strips in the last few minutes so they're a more manageable size and it makes your family think that you made more. :)
Serve over rice, or..........
Fried Rice
4 cups cooked rice (that's 1 1/3 cups uncooked rice), I like to use brown rice
3 scrambled eggs
about 1/3 to 1/2 cup (each) corn and peas. I usually pour frozen peas in until it looks like the proportions I want.
1 tsp soy sauce (it's best to just use the juice that come from the chicken and pour that over your rice when you dish it onto your plate)
1-2 tsp dried minced onions (optional, if you like a more varied taste)
salt and pepper to taste
After cooking rice (before it starts to stick to the pan, add other ingredients and mix well. Keep on low until well heated. Folding the mixture works best for making it even.
And for those of you trying to be a little healthier with your carbs by having brown rice, but find that even after the longer cooking time, it still tends to be harder and more seed like than white rice, here's a tip: bring water to a boil first (make sure you add about 1/4 cup extra water in addition to twice the amount of rice) with about 1 TBS salted butter, then add rice. When it returns to a boil, lower heat and simmer 45-50 minutes, then when all the water is absorbed but it's not sticking to the pan yet, stir it to make it fluffy, keep it covered as much as you can even after it's done cooking so it doesn't dry out!
It may sound like it's really involved, but in small steps it's really easy! And delicious!
Wednesday, April 6, 2011
Time with young kids
Just because I stay home with my kids, doesn't automatically equate to me spending lots of time with them, at least not lots of quality time that builds out relationship. When there are several small kids, all begging for my attention, it's sometimes difficult to not feel overwhelmed and just use the TV as a babysitter. But here are a few things that I've found to be helpful in building my relationships with my kids:
Read to them. As much as possible. We like to go to the library every week (or other week) and get a few new books. We read whenever they ask. I loved being read to as a kid and wanted to encourage a love of reading in my kids. And don't just read in a flat voice to get through the book, put emotion into it! If the main character is scared, sound scared! If the main character is running for their life, sound out of breath! These kinds of things make the books more fun and interesting to little kids, and seems to help them to get the idea that you don't need to watch TV to get an interesting story. We read books (one per child, and each picks out his or her own book, but gets to listen to the other child's book) at nap time, and again at bedtime. Then they each get a song and generally fall asleep well after that.
Play with them. Taking kids to the park is great, but mine really like it when my husband or I go own the slide with them, or spin them on the merry-go-round, or pushing them on the swing. They also love playing at home. We like to play tag (running in circles in our living room) play hide and seek (with themselves or with objects), build something with Lego 's together, or sit down and play with their toys with them!
Dance with them. This one's easy, all you have to do is not think about how ridiculous you look! I've noticed that sometimes "dancing" with kids includes jumping in one spot or in a circle, spinning (individual or picking up and spinning a child), and a series of silly looking wiggles. Either way, have fun and don't be afraid to be silly!
Let them help in the kitchen.Yes, "help" is sometimes a hindrance, and will add time to you food preparation, but they feel so important and appreciated! My kids love to tell dad that they helped make dinner, and if he doesn't thank them for dinner right away, they'll instruct him to say thank you for dinner! I like to let them help me make baked goods by putting everything out on the dinner table, so the kids can sit or kneel in the chairs to help measure, pour, stir and grease the pan. This usually involves a very big mess too, but since kids love to help so much, they get to help clean up too! Usually this involves me going over it again after they're done, but at least some of the mess goes away! One thing that helps me is to remind myself that I'm not running a restaurant, I'm raising children. That kind of puts it into perspective for me to not freak out when it's messy and there's twice as much baking soda as we need or the muffins are pointy. The point is that they enjoyed time with you.
Let them help you with chores. This is a hard one for me because they sometimes end up spreading the mess! But as I've tried to be gentle and not only show them how it is, but put my hands on theirs and help them get a feel for it, they've slowly improved. They've also gotten a better eye in seeing things that need to be picked up! It's one thing to pick up toys, but then when you have to vacuum the room you just picked up, you notice the little things that you missed!
Discover with them. Everything is amazing to a small child. If any of you have a preschooler, you know that from the "why" phase. It's hard, but just try to answer the stream of questions in the most accurate manner, that also explains and satisfies the child's curiosity. Even if it's watching a movie with them and talking to them about it. And I try to keep it limited to one movie a day or less. Also, going for walks at a two year old's pace and taking time to look at every nut, every rock, and every dandelion that you pass. Ask them to tell you a story about why they're poking the dirt with a stick, you may be surprised how active their imagination is!
Let them watch you. Sometimes kids can't really help. Things like sewing or using power tools. That doesn't mean that they need to leave you alone. They just need to be at a safe distance and they can really learn a lot from just closely studying you. When they're small, mom and dad are the most interesting people in the world, even in mundane tasks. You can also talk to them about what you're doing and why and they'll retain a lot more info than if you just told them about it without a demonstration.
I hope you enjoy the time with your kids!
This post took forever to write because my kids kept interrupting me to spend time with them, go figure!
Read to them. As much as possible. We like to go to the library every week (or other week) and get a few new books. We read whenever they ask. I loved being read to as a kid and wanted to encourage a love of reading in my kids. And don't just read in a flat voice to get through the book, put emotion into it! If the main character is scared, sound scared! If the main character is running for their life, sound out of breath! These kinds of things make the books more fun and interesting to little kids, and seems to help them to get the idea that you don't need to watch TV to get an interesting story. We read books (one per child, and each picks out his or her own book, but gets to listen to the other child's book) at nap time, and again at bedtime. Then they each get a song and generally fall asleep well after that.
Play with them. Taking kids to the park is great, but mine really like it when my husband or I go own the slide with them, or spin them on the merry-go-round, or pushing them on the swing. They also love playing at home. We like to play tag (running in circles in our living room) play hide and seek (with themselves or with objects), build something with Lego
Dance with them. This one's easy, all you have to do is not think about how ridiculous you look! I've noticed that sometimes "dancing" with kids includes jumping in one spot or in a circle, spinning (individual or picking up and spinning a child), and a series of silly looking wiggles. Either way, have fun and don't be afraid to be silly!
Let them help in the kitchen.Yes, "help" is sometimes a hindrance, and will add time to you food preparation, but they feel so important and appreciated! My kids love to tell dad that they helped make dinner, and if he doesn't thank them for dinner right away, they'll instruct him to say thank you for dinner! I like to let them help me make baked goods by putting everything out on the dinner table, so the kids can sit or kneel in the chairs to help measure, pour, stir and grease the pan. This usually involves a very big mess too, but since kids love to help so much, they get to help clean up too! Usually this involves me going over it again after they're done, but at least some of the mess goes away! One thing that helps me is to remind myself that I'm not running a restaurant, I'm raising children. That kind of puts it into perspective for me to not freak out when it's messy and there's twice as much baking soda as we need or the muffins are pointy. The point is that they enjoyed time with you.
Let them help you with chores. This is a hard one for me because they sometimes end up spreading the mess! But as I've tried to be gentle and not only show them how it is, but put my hands on theirs and help them get a feel for it, they've slowly improved. They've also gotten a better eye in seeing things that need to be picked up! It's one thing to pick up toys, but then when you have to vacuum the room you just picked up, you notice the little things that you missed!
Discover with them. Everything is amazing to a small child. If any of you have a preschooler, you know that from the "why" phase. It's hard, but just try to answer the stream of questions in the most accurate manner, that also explains and satisfies the child's curiosity. Even if it's watching a movie with them and talking to them about it. And I try to keep it limited to one movie a day or less. Also, going for walks at a two year old's pace and taking time to look at every nut, every rock, and every dandelion that you pass. Ask them to tell you a story about why they're poking the dirt with a stick, you may be surprised how active their imagination is!
Let them watch you. Sometimes kids can't really help. Things like sewing or using power tools. That doesn't mean that they need to leave you alone. They just need to be at a safe distance and they can really learn a lot from just closely studying you. When they're small, mom and dad are the most interesting people in the world, even in mundane tasks. You can also talk to them about what you're doing and why and they'll retain a lot more info than if you just told them about it without a demonstration.
I hope you enjoy the time with your kids!
This post took forever to write because my kids kept interrupting me to spend time with them, go figure!
Monday, April 4, 2011
Hot pads

First, I crocheted the basic shape out of scrap yarn, I had around the house and had never used. I single crocheted it with either an E or F hook. I think it was about 22 across for the grabber ones, and about 27 across for the trivet ones, I just kind of eye-balled it and the made another to match. I did enough rows to make the big ones square, and enough to cover my hand on the small ones (probably about 24 or or so).
Second, I took some scrap fabric that I never liked the look of and put two layers of that (cut to about size) on each one. To hold that in place, I just took some thread that I don't really like the color of anyway and tired in a lot like you would tie a quilt, just to hold it in place.
Eventually I got to the next step which was to pit on the fabric that I liked. This fabric used to part of a skirt that I got for free but the cut was REALLY unflattering on me, plus I like to not have too many patterns on my bottom half since I'm a little more pear shaped and I like more neutrals on the bottom so people's eyes aren't drawn to the overly curvy areas. Moving on...I cut the fabric I wanted just a little bigger than the currant hot pad size for seam allowance, and had several small strips of fabric for the loops to hang them up. On the loops I just folded them over with right sides together and sewed one line near the open edge. I used a crochet hook to turn them right side out. For the hot pads themselves, I sewed the fabric for the outside on three sides with right sides together, then turned them right side out, put the innards of the hot pads in, folded the frayed edges in, tucked the loops I'd sewn in the corner, and sewed really close to the edge to seal up tat side.
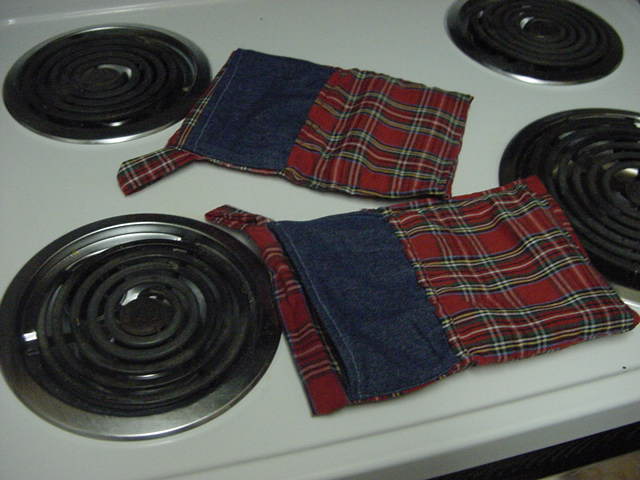
For the grabber hot pads, I just tucked an extra piece of fabric in there when I was sewing up the sides (I had to be careful to make sure the right side would be facing out) so it made a little pocket for my hand to fit into. It was very simple, and made with things I had around the house and wasn't using, so virtually free! Then I noticed something.

It took me forever to get around to finally fixing it, during which time I also noticed that when I needed to take something out of the oven or off the burner quickly, it took a bit of time to figure out which side of the hot pad had that stupid pocket in it!
So, I took some more scrap fabric, in a different color, and cut it to just a bit bigger than I needed.


Saturday, April 2, 2011
4 year old's decision to de-clutter

Friday, April 1, 2011
Basic Muffins
There's nothing like muffins for breakfast to make a person feel right at home! The other nice thing about muffins is that they're fairly easy to make, even for someone as domestically challenged as I have been, and sometimes still am.
Here's the basic reipe:
2 cups flour (you can use white, but I like to use whole wheat, or at least half whole wheat, because it makes it a little healthier, and muffins are sweet enough to disguise most of the wheat flavor)
up to 1 cup sweetener (while sugar, brown sugar, some people use applesauce, whatever)
1 tsp baking powder
1/2 tsp salt
1 cup milk
1 egg
1/4 cup oil
up to 1 1/2 cups additions*
Combine ingredients. Bake 350 degrees for 20-25 minutes (until fork or toothpick inserted comes out clean.)
Notes:
*additions can mean anything from banana, chocolate chips, berries, cinnamon applesauce, whatever you're in the mood for!
Mix with a fork, overmixing will make your muffins pointy on top.
If you want a sort of chocolate chip cookie muffin, use brown sugar for the sweetener, and of course add chocolate chips!
ENJOY!
Subscribe to:
Posts (Atom)